GOLFMK8
GOLFMK7
GOLFMK6
GOLFMKV

Cuzoe's 2015 Golf TDI S Journal

Cuzoe

Autocross Champion
Location
Los Angeles
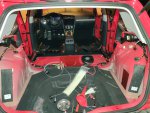
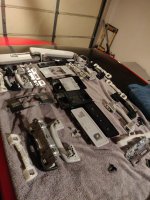
I'll add (bad) pictures from my phone later... but finally tore the car apart to get several retrofits done. While in progress I decided that I would retrofit DCC (while I'm in there :ROFLMAO: ). This is going semi-smoothly, with my mistakes and struggle documented here. The following is officially in progress and/or done...

Heated seat wiring (and replacement of A/C controls with heated seat buttons)
Blind spot monitoring sensors installed and wired (wired to door disconnects, but have done the wiring in the doors yet)
Parking aid/assist sensors (6 front, 6 rear) installed in bumpers, wiring installed
Re-pinned connector for rear sensors, aftermarket harnesses are intended to run on the left side of car (and wired accordingly, but OEM is right side so...)
Replaced front crash bar with proper one for ACC radar (see post above this)
Installed 2" Ecohitch in rear (this took some "massaging" and was missing hardware, it's on and extremely solid but I cannot recommend)
Front fogs installed in bumper
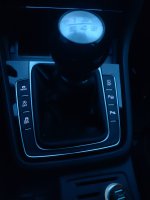
Wiring installed for all 6 shifter surround buttons, which are also installed
Footwell lights and wiring, front and rear
Dieselgeek Superpin (car still in pieces so haven't driven but eliminated some slop, will give opinion once I drive)
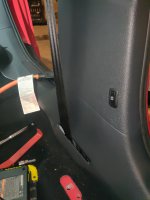
Motion sense alarm wiring/disable button on B pillar
Added the dealer switch to demo Helix system to my amp rack (would like to put it somewhere accessible in car but the box is, relatively, massive so I need to find a place)
Started sound deadening of the rear arches and seat area

Updated the OP, blah blah blah.
 

Acadia18

Autocross Champion
Location
The Greater Boston Metropolitan Area
Car(s)
2019 Golf R
Question for you. When you went to the 9.2" screen, did you retrofit MIB2.5, or did you do the mysterious MIB2 to 2.5 upgrade I've heard rumors about?
 

Cuzoe

Autocross Champion
Location
Los Angeles
The next few posts won't really be in order of when things happened. But I did take some pictures at random points as my goal has transitioned from a Thanksgiving Day drive to a Christmas Day drive to a Martin Luther King Day drive, haha. But to make sure I actually post pics (which people actually care about) I'm going to post the pics first then come back and add descriptions.
 

Dog Dad Wagon

Autocross Champion
Location
Go Birds
Car(s)
16 Touareg TDI
How are the 034 motorsports mounts treating you? Frankly - I’d imagine they perform worse than the factory diesel mounts. The diesel mounts on my girlfriends 2014 JSW TDI (I know, previous generation / not MQB) are super beefy for factory mounts. I wouldn’t replace these mounts with anything besides OEM for the performance/stiffness.
 

Cuzoe

Autocross Champion
Location
Los Angeles
So a good amount of this is documented across other threads but in theory it should be here too I guess.

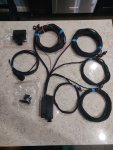
Picked up the Parking Aid/Assist kit from Ali, then grabbed this universal PDC punch kit.
IMG-20200913-WA0019.jpg

IMG_20200911_182439.jpg

IMG_20200912_161613.jpg


Measured the sensors in the kit. All of them are 18.2mm except the two front parallel park assist sensors which are 26.5mm.
IMG_20200912_161433.jpg

IMG_20200912_161454.jpg


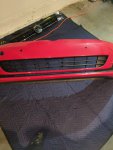
My bumpers (and so I assume all the Mk7 bumpers) are marked for the holes, just need to punch them. The tool makes it dead simple, took about 2 hours to punch the holes.
IMG_20200912_164311.jpg

IMG_20200913_122316.jpg

IMG_20200912_163342.jpg

IMG_20200912_163335.jpg
 

Dog Dad Wagon

Autocross Champion
Location
Go Birds
Car(s)
16 Touareg TDI
So a good amount of this is documented across other threads but in theory it should be here too I guess.

Picked up the Parking Aid/Assist kit from Ali, then grabbed this universal PDC punch kit.
View attachment 197852
View attachment 197850
View attachment 197853

Measured the sensors in the kit. All of them are 18.2mm except the two front parallel park assist sensors which are 26.5mm.
View attachment 197855
View attachment 197857

My bumpers (and so I assume all the Mk7 bumpers) are marked for the holes, just need to punch them. The tool makes it dead simple, took about 2 hours to punch the holes.
View attachment 197856
View attachment 197858
View attachment 197862
View attachment 197863

dude you’re a beast. And that is a compliment of the highest order. Love your build threads. True DIY, no rails, OEM quality retrofits
 

Cuzoe

Autocross Champion
Location
Los Angeles
How are the 034 motorsports mounts treating you? Frankly - I’d imagine they perform worse than the factory diesel mounts. The diesel mounts on my girlfriends 2014 JSW TDI (I know, previous generation / not MQB) are super beefy for factory mounts. I wouldn’t replace these mounts with anything besides OEM for the performance/stiffness.
I have no point of comparison except my stock mounts and the 034s... But my factory mounts at about 30k where pretty loose. I could easily move the engine by hand and I could flex the mounts by hand once they were removed. Mounts were 5 years old (stop sale car, bought new in 2017) but driven very gently by me.

The 034s could not be flexed by hand and I couldn't move the engine by hand after install. Car felt better after the install but longevity is still unknown. That was around the time I started driving the canyons so if these fail I suspect it will be in less than $30k. I'm not willing to deal with anything beyond stock vibration levels so may try stock mounts at that point. I know the BFI's get a lot of love but I haven't read any reports from TDI drivers on NVH.
 

Cuzoe

Autocross Champion
Location
Los Angeles
dude you’re a beast. And that is a compliment of the highest order. Love your build threads. True DIY, no rails, OEM quality retrofits
Thanks man, really appreciate that. I'm not comfortable going into anything mechanical yet (engine, transmission, etc) but I'm comfortable with anything electrical. And getting there with suspension, going to do my first brake job next month... Macan calipers and PP rears.
 

Cuzoe

Autocross Champion
Location
Los Angeles
Gotta give credit to others on the forum; @Fraysa, @o_a_ravi, @Reaper1, @IWMTom, @Nuje , @lijetta18t and anyone else who contributed... particularly in the PDC Question turned retrofit thread as this "knowledge" has come from their prior findings and discussions that took place through the process/planning of our respective retrofits.

Once the holes are punched it's time to install the sensors. The mounts come with 3M (or 3M like) adhesive. Based on other's experience it is not recommended to trust this. This is not helped by the fact that the mount points are not flat planes, being in the bumper. It will be a bit of a pain but for perfectly flush sensors best practice would be to scrape the included adhesive off the mounts and instead use JBWeld to secure them in place.
Screenshot_20201003-074530.jpg


As usual make sure the surfaces are clean (my bumpers had tape over the hole locations so were easy to clean). I also recommend installing the sensors before the JBWeld sets. This will ensure the sensors are centered in the holes you punched. Then use some long armed C clamps to keep the whole deal in place over night. There is an official tool to hold the mounts on place, the part number is somewhere in the thread linked above.

The Ali kit comes with two mount styles. One for the two 26.5mm front parallel assist sensors, and one for the remaining ten 18.2mm sensors. This is a pic of two small sensors/mounts but shows how the 26.5mm will sit angled in its mount. It will make sense once you're looking at where the 26.5mm mounts on the "fender area" of the front bumper, it can only fit one way.
IMG_20200913_171541.jpg


Officially there are several (8+ at least) different mount part numbers. I priced them at $15-30 each. I didn't try to source them. The official way to install the mounts is using adhesive (like JBWeld) and plastic staples. The tool isn't that expensive but you could end up burning holes through your bumper, haha.
Something like these... https://www.amazon.com/hot-stapler/s?k=hot+stapler
Used like this...

This picture shows one of the parallel park sensors in the front bumper. They can only point one way. Second picture shows the center-outboard mount, which I installed facing the wrong direction. I based this on the drawing in the Erwin manual but it's not correct. The fog light frame has to be removed to install the mounts so it wasn't obvious to me that it would interfere. Little trimming of plastic trim gets you clearance but installed properly no trimming would be necessary. No pictures of the center-inboard sensors/mounts but the direction they face is dictated by the cutout in the crash bar foam. It's obvious when you see it.
IMG_20200913_171902.jpg

IMG_20201003_062727__01.jpg


Lots of space in the rear bumper so mount/sensor connector direction isn't too important although the center-inboard ones can only face one direction. The mounts for these two will need the corners cut off to sit flush, but no big deal. Then you just layout the harness in a way that allows everything to connect. I secured the harness using zip ties and these. They are adhesive backed zip tie blocks. They are industrial type, good from -30-150°F (allegedly). I don't know that they're better than those from my local hardware store but they work great.
IMG_20201002_093515.jpg

IMG_20201002_093508.jpg


This is the flushness of my sensors. Mounts installed without scraping off the included adhesive but using JBWeld for security.
IMG_20201025_132321.jpg
 
Last edited:

Cuzoe

Autocross Champion
Location
Los Angeles
No exciting pictures here but some heads up information. Factory routing of the harness to the rear sensors is down the right side of the vehicle. The Ali Express harness (and other PDC retrofit harnesses it seems) are intended to be routed down the left side. This was discovered by the folks mentioned in the previous post and I confirmed via continuity check of the harness.
IMG_20201004_130259.jpg
IMG_20201004_130246.jpg


The harness I received is plenty long enough to follow OEM right side routing. And the rear PDC buzzer gets mounted on the right side, outboard of the C-pillar trim. I initially installed it on the wrong place, pictured. I didn't get a pic of the proper location, which is up higher. If you route the harness down the left side the buzzer will also have to be installed on the left side (unless you extend the wires). I didn't pull the C-pillar trim on that side so I don't know if the holes are there to mount the speaker buzzer.
IMG_20201006_233257.jpg


There is a grommet into the rear bumper area on both sides of the hatch. PDC harness has to go through one of these grommets. The right side will already have the harness for the license plate lights. If you go down the left side the sensor harness gets installed (in the rear bumper) to connect over there. But if you go down the right side and want to have the sensor harness connector on the right side you need to do some rewiring. My recommendation is to rewire at the PDC module connector.

This first picture is the grommet on the right side which now consists of PDC harness, license plate light harness and right side blind spot monitor harness. Second picture is the left side grommet (from inside the car) which only has the left blind spot monitor harness going through it. Harness was temporarily secured in this picture. Third picture (partially) shows final routing of that harness which has been properly secured with zip tie blocks. The blind spot monitor harness does not have to be disconnected to remove the rear bumper so I felt it made more sense to route it across the car on the inside.
IMG_20201018_122015.jpg

IMG_20201004_155944.jpg

IMG_20201004_155955.jpg


Another note... If you route the PDC harness down the right side it puts the connector in the same place as the license plate harness connector for pulling the rear bumper. This could be important if the tech removing the bumper gets distracted while removing it. That's the practical reason, besides the preference for OEM routing where possible.
 

Cuzoe

Autocross Champion
Location
Los Angeles
Rear bumper being removed makes this the time for install of a hitch. I chose the Ecohitch from TorkLift Central, with 2" receiver.
https://torkliftcentral.com/2015-2017-volkswagen-golf-ecohitch

TL;DR... Solidly built and solidly secured. I have zero concern about its ability to hold rated weight. The paint/coating on some of the support brackets is sub-par. Loose and missing hardware. Poorly packaged overall which may have contributed to the poor initial fit. Again, I'm sure it will do its job... but I can't recommend it.

So this is how it was packaged in the box. The right way to do this would be to use molded styrofoam or the type that expands to fill the box. I don't know their sales volume or what that costs, maybe it's prohibitive. But if so they could at least make some attempt to securely wrap the ends of this large piece of metal that's being shipped in a cardboard box. Instead they balled up some paper and put it around the ends then dropped it in the box with the , brackets, and hardware left to move around in shipping. Absolute bull**** in my opinion.
IMG_20200913_131756.jpg

IMG_20200913_131858.jpg

IMG_20200913_131801.jpg


So once I had everything out of the box I didn't inventory of the hardware. Big pain because the bag has been left to flop around in the box. Ziploc end was open and it had also been cut open, presumably by one of the support brackets since they were also allowed to move freely in the box. I had the pleasure of un-balling the paper shaking it all out on my garage floor to see if hardware had gotten into it (it had). Also had washers stuck to random packing tape that was in there 😤 . Once everything has been shaking out and laid out it was clear that some hardware was missing (and I was given extras of other hardware). The main shipping box was taped at every seam so the folks packing this thing up are simply not doing an inventory... inexcusable!
IMG_20200913_132100.jpg

IMG_20200913_133419.jpg


Looking at everything getting ready for the install, first noticed the support brackets flaking. Little wire brush to finish the flaking and then some POR for that. Got one side of the hitch temporarily mounted, then saw the other was pretty far from lining up :mad:. Some "thermal, physical and percussive persuasion" got it installed.
IMG_20200913_131942.jpg

IMG_20200913_140805.jpg


The directions are okay. They say to remove and discard the rear crash bar foam. I don't know why, maybe it's necessary on some other platform but not on my Golf. The hitch is mounted using the crash bar mount points but no where near the foam. I broke part of my foam because I didn't really know how to remove it, but I blame them, haha. The piece I broke was successfully re-attached with JBWeld.
IMG-20200913-WA0015.jpeg

IMG_20200913_144934.jpg


At the end of the day it was installed. Temporarily attached in and removed the rear bumper at least 5 time while trimming the valence to clear the receiver. Not wanting to trim too much of course. Also required some trimming by the support brackets, not mentioned in the instructions but pretty minor (could get away without doing it but it will be pushing the valence a little). The directions give recommended cut out dimensions but they don't seem to account for the little aesthetic trim piece. I can't imagine a beautiful to include a template for the cutout in the instructions. all the customer we need to do is center the template on their valence, mark it and make the cuts.
IMG_20200913_144205.jpg
 
Last edited:

Cuzoe

Autocross Champion
Location
Los Angeles
These will just be pics that I thought were interesting. Not in any real order, but with my commentary included, haha.

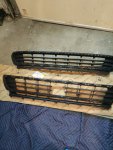
Lower grill with cutout for ACC sensor, such a PITA to remove/install
IMG_20200912_153931.jpgIMG_20200912_204925.jpg

DCC Harness fresh out of the box. The harness is built with the assumption your vehicle already has a rear level sensor (for auto-leveling headlights). That sensor would be wired to the headlight range control module. The Ali-Express DCC harness is wired for you to tap in at the range control module beneath the steering wheel. No lighting package in my S so I had no sensor. Laser stamped wires to go straight from the DCC Module to the rear level sensor.
IMG_20201001_235126.jpgIMG_20201004_183357.jpg

Home Depot hardware rivnut tool, it did the trick. DCC Module and rear accelerometer installed.
IMG_20201018_115939.jpgIMG_20201018_115946.jpgIMG_20201102_115321.jpgIMG_20201102_115325.jpg

Neuspeed Turbo Discharge Damper installed. Really more of a delete I guess, but to give some turbo noise, not add performance. Neuspeed suggests removing more than what is actually required, assuming you've pulled the battery and battery tray. Also installing the Neuspeed intake (for the sound) but no picture, it looks like all the other intakes.
IMG_20201122_171147.jpg
 

Cuzoe

Autocross Champion
Location
Los Angeles
Then some random in-progress pictures...

Pull wire through the grommet in the firewall, had lots of harnesses to get through here (fog lights, ACC radar, parking sensors, TPMS/ESC set switch wire to ABS, DCC wiring, sound actor). Had to de-pin the connectors to pull them through, but got them through.
IMG_20201121_112536.jpgIMG_20201121_112558.jpg

Full interior stripped. Installed the DieselGeek Superpin along with all the retrofit wire runs. Also sound deadened pretty much everywhere but only grabbed one partial pic of the area under the rear bench (along with my amp rack). Adhesive backed butyl, adhesive backed foam of some type, then MLV.
IMG_20201012_183655.jpgIMG_20201115_181430.jpgIMG_20201004_202833.jpg

Then of course, all the wiring run up to the front of the car. I'll give you the full picture here, just because it's gnarly, haha.
IMG_20201129_193350.jpg

IMG_20201129_153757.jpg


At some point all of the wires had been marked, barely. Because of the number of systems I was adding to the can bus (tying into the gateway) I decided to create my own plug. Most of the retrofit harnesses come with little jumper things to add bus wires but that was going to get messy and confusing. I chose to use a 25 pin D-Sub with slide locks. It breaks out every can network in a place that's easy to troubleshoot or tie into later (not that I have anything left I want to retrofit). Don't know why I said that... since this time I have retrofitted Mk8 heated steering wheel, external soundaktor, direct tpms, oem wireless charging, facelift gateway, facelift BCM, RGB interior lighting, overhead ambient lighting, I think that's it 🤷‍♂️. Harness wrapped in tesa tape and the connector has since been marked. I'll add pictures of the whole under dash area when I'm completely done, if it looks nice, haha.
IMG_20210102_055933.jpgIMG_20210102_060025.jpg
 
Last edited:

Cuzoe

Autocross Champion
Location
Los Angeles
I updated the OP but the following retrofits are now complete, finally...

Blind Spot Monitoring with Rear Traffic Alert (got to see it action in my work parking lot yesterday)
Heated Seats
Parking Aid/Assist
Footwell Lighting
Adaptive Cruise Control
Motion Sense Alarm
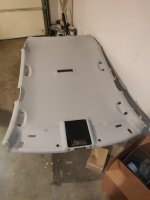
Full black interior (more of a modification really)... upper pillars, headliner, handles, visors, lighting console, etc.
OEM LED interior lighting... overhead, rear overhead, visor lights
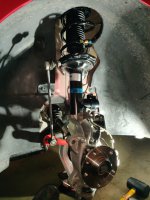
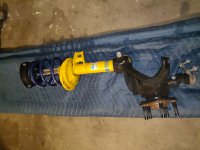
Dynamic Chassis Control (required installing GTI/R aluminum steering knuckles, 55mm dampers)
Bilstein B4 Damptronics with GTI Springs
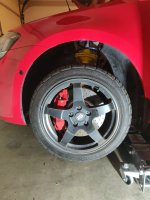
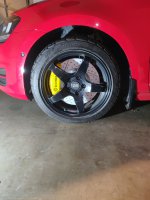
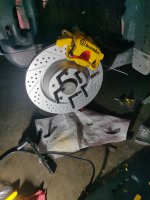
Brembo (Porsche Macan) 4 pot front calipers - removed my Brembo 6 pot 17z's

GTI PP rear calipers

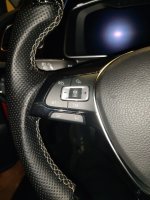
Attached random pictures, in random order. I'll get around to real posts about each of these, with some better pictures, later...
IMG_20210116_134524.jpgIMG_20210119_065405.jpgIMG_20210123_195716.jpgIMG_20210123_195736.jpgIMG_20210124_140010.jpgIMG_20210124_181944.jpgIMG_20210125_114904.jpgIMG_20210125_230233.jpgIMG_20210129_203522.jpgIMG_20210130_112144.jpg
 
Top